Textures
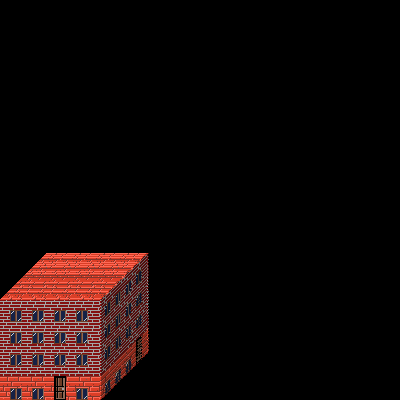
In the previous tutorial (Hello cube) we made a pretty cube. But we know, solid colors is not enough. In this step, we try to add windows and doors.
Our cube should be like as:

In this step, we need code from previous tutorial (Hello cube), but instead solid colors, we need to change walls.
wall.wall {
    texture: tex.brick; /* background of wall will be brick */
    middle: floor.windows; /* floors will have windows */
    bottom: floor.doors-and-windows; /* zero floor will have doors and windows */
    padding: 10;
}

wall.roof {
    texture: tex.roof; /* just only roof texture */
}
Ok, so we add floor-objects, so we need to add rules with floors:
floor.windows {
    middle: tex.window; /* texture of object */
    align: center; /* all windows will be aligned to center */
    height: 12; /* height of the floor */
    padding: 10; /* padding between windows */
}

floor.doors-and-windows {
    texture: tex.roof; /* floor can have a background too */
    middle: choice(tex.window, tex.window, tex.door); /* this function randomly chooses window, window or door. */
    padding: 10; /* padding between objects on the floor */
}
And we need to describe textures:
tex.window { texture: "textures/wall-objs/window.png"; }
tex.door { texture: "textures/wall-objs/door.png"; }
tex.brick { texture: "textures/wall/brick.png"; }
tex.roof { texture: "textures/wall/red-tile.png"; }
And is enough to show better cube. The final code should be like this:
world {
    width: 400;
    height: 400;
    body: my-little-cube;
}

my-little-cube {
    display: cube;
    wall: wall.wall;
    roof: wall.roof;

    width: 100;
    depth: 100;
    height: 100;
}

wall.wall {
    texture: tex.brick;
    middle: floor.windows;
    bottom: floor.doors-and-windows;
    padding: 10;
}

wall.roof {
    texture: tex.roof;
}

floor.windows {
    middle: tex.window;
    align: center;
    height: 12;
    padding: 10;
}

floor.doors-and-windows {
    texture: tex.roof;
    middle: choice(tex.window, tex.window, tex.door);
    padding: 10;
}

tex.window { texture: "textures/wall-objs/window.png"; }
tex.door { texture: "textures/wall-objs/door.png"; }
tex.brick { texture: "textures/wall/brick.png"; }
tex.roof { texture: "textures/wall/red-tile.png"; }
You can try it online: https://pixelopolis.herokuapp.com/examples/Tutorial/Textures
On the next tutorial, I will describe about containers: (Containers)